
Ottoman Bed Assembly Instructions: A Comprehensive Guide
Embarking on assembling your ottoman bed? This detailed guide provides step-by-step instructions, ensuring a smooth and successful build, from unpacking to final checks!
Preparation: Workspace and Tools
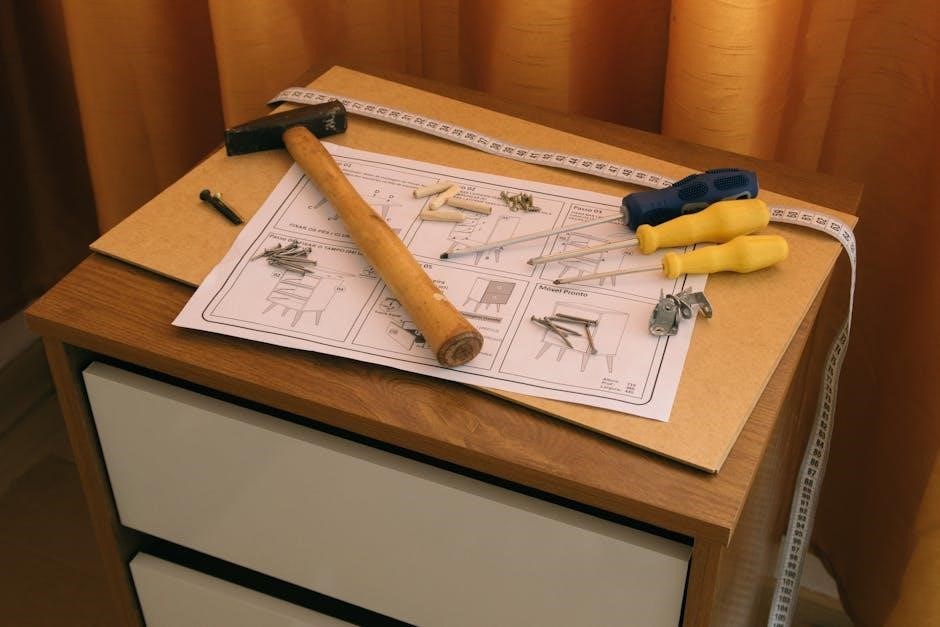
Before you begin the ottoman bed assembly, meticulous preparation is key to a stress-free experience․ Designate a spacious, clean workspace, ideally covered with a protective sheet or cardboard to prevent scratches to both your floor and the bed components․
Gather the necessary tools: a screwdriver set (Phillips and flathead), a rubber mallet, and potentially a power drill with appropriate bits – check your specific model’s instructions․ Having a tape measure and level handy will also prove beneficial․
Familiarize yourself with all included parts by cross-referencing them with the parts list in the manual․ This proactive step avoids mid-assembly frustration․ Ensure adequate lighting and clear access to all components․ A second person can be incredibly helpful, especially during larger assembly stages․
Unboxing and Component Inventory
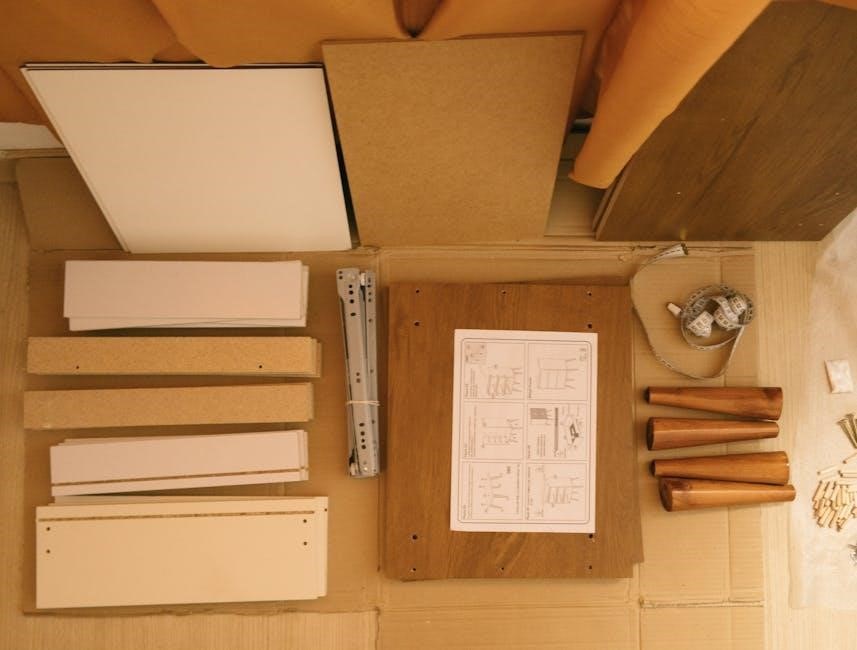
Carefully unpack all components from the packaging, avoiding the use of sharp objects that could damage the parts․ Lay everything out in an organized manner within your prepared workspace․ This allows for easy identification and prevents lost pieces․
Crucially, compare each item against the detailed parts list provided in the instruction manual․ Note the quantity and description of each component – headboard, footboard, side rails, centre support, ottoman mechanism parts, slats, and fabric base․
Document any discrepancies immediately․ If parts are missing or damaged, contact the retailer or manufacturer before proceeding․ Keeping the packaging materials until assembly is complete is also advisable for potential returns or exchanges․ A thorough inventory ensures a smooth assembly process․
Understanding the Ottoman Bed Frame Components
Familiarizing yourself with each part is vital before starting․ The headboard and footboard provide the primary structure, often featuring decorative panels․ Side rails connect these, forming the bed’s perimeter, while the centre support beam adds crucial stability, especially for larger sizes․
The ottoman mechanism is the core of this bed type․ It includes lifting straps, gas lift struts, and potentially hinges – these enable the platform to raise, revealing storage space․ Understanding how these interact is key․
Slats provide mattress support, and the fabric base covers the entire structure, creating a finished look․ Identifying each component and its function will streamline the assembly process and prevent errors․ Refer to the diagrams in your manual frequently․
Headboard and Footboard Identification
Distinguishing the headboard from the footboard is the first step․ The headboard is typically taller and designed to be positioned against the wall, often featuring a more elaborate design or upholstery․ Examine for pre-drilled holes intended for side rail attachment – these will be prominent․
The footboard is generally shorter and simpler in design․ It may have similar attachment points for the side rails, but often lacks the height and decorative elements of the headboard․ Some footboards may be solid panels, while others have open designs․
Carefully check your model’s instructions, as designs vary․ Some beds may have identical headboards and footboards․ Identifying these components correctly ensures proper frame assembly and prevents structural issues later on․
Side Rails and Centre Support Beam
Side rails are the long, horizontal pieces that connect the headboard and footboard, forming the bed’s perimeter․ They usually have metal brackets or pre-drilled holes along their inner length for slat support and attachment to the end pieces․ Ensure you identify the left and right rails, as they may be specifically designed․
The centre support beam, if included, runs lengthwise down the middle of the bed, providing crucial reinforcement, especially for larger sizes․ It typically features adjustable legs to ensure level support․ This beam significantly reduces sagging and increases the bed’s overall stability․
Inspect all components for damage before assembly․ Proper alignment of the side rails and secure attachment of the centre beam are vital for a durable and comfortable ottoman bed․
Ottoman Mechanism Parts
The ottoman mechanism is the heart of the lift-up storage feature; Key components include the gas lift struts, lifting straps, and the frame supports that house these elements․ Gas lift struts provide the hydraulic power for easy lifting and lowering of the bed platform․
Lifting straps, usually heavy-duty nylon or webbing, connect the platform to the struts, transferring the lifting force․ Frame supports are metal brackets or reinforcements attached to the bed frame to securely mount the struts and straps․
Carefully inventory all mechanism parts, checking for correct quantities and any signs of damage․ Understanding how these components interact is crucial for successful assembly and smooth operation of the ottoman function․
Assembling the Headboard
Begin by laying the headboard pieces on a protected surface to prevent scratches․ Typically, this involves attaching side panels to the main headboard panel using bolts and an Allen wrench – ensure proper alignment before tightening․ Check the instructions for specific bolt sizes and locations, as these can vary between models․
Some headboards may include decorative elements or upholstery that need to be attached at this stage․ Secure these carefully, following the provided diagrams․ Pay close attention to any pre-drilled holes or mounting points․ Once assembled, carefully stand the headboard upright and ensure it is stable and square․
A correctly assembled headboard forms the foundational support for the entire bed frame, so accuracy is paramount․
Attaching the Side Rails to the Headboard and Footboard

Carefully position the side rails alongside the assembled headboard and footboard․ Most ottoman beds utilize metal brackets or hooks to connect these components․ Align the brackets on the side rails with those on the headboard and footboard, ensuring a snug fit․
Secure the rails using bolts, screws, or locking mechanisms, as specified in your instructions․ Tighten these fasteners firmly, but avoid over-tightening, which could damage the frame․ Double-check that all connections are secure and that the side rails are level with both the headboard and footboard․
A stable connection here is crucial for the overall structural integrity of the bed․ This step establishes the rectangular shape of the bed frame․
Installing the Centre Support Beam
Locate the centre support beam and its corresponding mounting points along the inner sides of the side rails․ This beam provides essential reinforcement, particularly for larger bed sizes, preventing sagging and ensuring even weight distribution․
Position the beam centrally between the side rails and align the mounting brackets․ Secure it using bolts or screws, tightening them firmly to create a stable connection․ Ensure the beam is level and properly aligned before fully tightening the fasteners․
Some models may feature adjustable legs on the centre beam; adjust these to ensure the beam rests firmly on the floor, providing maximum support․ Proper installation of this beam is vital for the longevity and stability of your ottoman bed․
Assembling the Ottoman Mechanism – Stage 1
Begin by identifying the lifting straps – these are crucial for the ottoman functionality․ Attach these straps to the wooden frame, typically using screws or heavy-duty staples, ensuring they are securely fastened to withstand repeated lifting and lowering․
Position the straps according to the manufacturer’s instructions, usually along the sides of the bed frame․ Pay close attention to the strap orientation; incorrect placement can hinder the smooth operation of the lifting mechanism․ Double-check all attachments for stability before proceeding․
This stage focuses on creating a solid foundation for the gas lift struts․ Ensure the straps are taut but not overly stretched, allowing for flexibility during operation․ Secure attachment is paramount for safe and reliable use of the ottoman bed․
Attaching Lifting Straps to the Frame
Carefully position the lifting straps along the interior sides of the bed frame, aligning them with the pre-drilled holes or designated attachment points․ Utilize the provided screws – typically self-tapping – and a screwdriver to firmly secure each strap․ Ensure the straps are taut, but avoid over-tightening, which could damage the frame or the straps themselves․

Verify that each strap is attached symmetrically on both sides of the bed to maintain balance during operation․ Double-check the screw placement, ensuring they are fully embedded and do not protrude, potentially causing snagging or injury․ Consistent strap tension is vital for smooth lifting․
Inspect each attachment point for stability, gently testing the strap’s hold before moving on․ Proper strap attachment is foundational for the entire ottoman mechanism’s functionality and safety․
Assembling the Ottoman Mechanism – Stage 2
Now, focus on connecting the gas lift struts to the previously installed lifting straps and the bed frame’s headboard section․ Align the strut’s mounting points with those on the straps, ensuring a secure fit․ Utilize the provided bolts and washers, tightening them firmly with a wrench or socket set․
Pay close attention to the orientation of the struts; they are often side-specific․ Incorrect installation can hinder the lifting action or compromise safety․ Confirm that both struts are connected with equal tension and symmetry․
Test the initial connection by gently attempting to lift the bed platform․ If resistance is encountered, re-examine the strut alignment and bolt tightness․ Secure all connections before proceeding to the next stage, prioritizing stability and smooth operation․
Connecting the Gas Lift Struts
This crucial step involves attaching the gas lift struts, the power behind your ottoman bed’s lifting function․ Carefully align the strut’s smaller end with the designated mounting point on the bed frame, typically near the headboard․ Ensure the larger end faces towards where the platform will lift․
Use the provided hardware – bolts, washers, and potentially clips – to secure the strut․ Tighten these firmly, but avoid over-tightening, which could damage the frame or strut․ Repeat this process for the second strut, maintaining symmetry and equal tension on both sides․
Double-check that the struts are securely fastened and correctly oriented before proceeding․ Incorrect attachment can lead to instability or malfunction․ A properly connected strut is essential for safe and effortless operation․

Securing the Ottoman Platform
Now, it’s time to attach the ottoman platform, the base upon which your mattress will rest․ Carefully position the platform onto the assembled frame, ensuring it aligns with the pre-drilled holes or designated support points․ This platform often consists of a large, flat panel, sometimes pre-covered in fabric․
Utilize the screws provided in your hardware kit to secure the platform to the frame․ Start by loosely attaching the platform at each corner, then progressively tighten all screws for even distribution of weight and stability․ Avoid over-tightening, which could strip the screw holes․
Confirm the platform is flush with the frame and doesn’t wobble․ A secure platform is vital for supporting your mattress and ensuring the ottoman mechanism functions correctly․ Proper attachment prevents shifting during use․
Installing the Slats
With the platform secured, the next crucial step is installing the slats․ These wooden or metal supports provide essential mattress support and distribute weight evenly across the bed frame․ Typically, slats are spaced evenly across the platform, resting on designated ledges or supports․
Begin by placing the first slat, ensuring it’s securely seated in its position․ Continue adding slats one by one, maintaining consistent spacing between each․ Some models may require you to secure the slats with screws or plastic caps; follow the manufacturer’s instructions closely․
Double-check that all slats are firmly in place and level․ Proper slat installation is paramount for mattress longevity and comfortable sleep․ Ensure there are no gaps or protruding edges that could damage your mattress․
Attaching the Fabric Base to the Frame
Now, it’s time to attach the fabric base, completing the ottoman bed’s aesthetic and functional design․ Carefully position the fabric base over the assembled frame, ensuring it aligns correctly with all edges․ Typically, this involves stretching the fabric taut and securing it using staples, tacks, or Velcro strips․
Start at one corner and work your way around the perimeter, gradually attaching the fabric․ Maintain even tension to avoid wrinkles or sagging․ Pay close attention to corners and curves, carefully folding and securing the fabric for a neat finish․
Ensure all staples or fasteners are securely in place and that the fabric is firmly attached to the frame․ A well-attached fabric base provides a clean look and contributes to the bed’s overall durability․

Testing the Ottoman Lifting Mechanism
Before fully utilizing your new ottoman bed, thoroughly test the lifting mechanism to ensure smooth and safe operation․ Gently attempt to lift the ottoman platform, observing the movement of the gas lift struts and lifting straps․ Confirm the platform rises and lowers evenly without any resistance or unusual noises․
Check for any obstructions or points of friction that might hinder the mechanism․ Repeat the lifting and lowering process several times, gradually increasing the force applied to simulate regular use․ Verify the locking mechanism, if present, engages and disengages correctly․
If any issues are detected, re-examine the assembly steps to identify and correct any errors․ A properly functioning lifting mechanism is crucial for the ottoman bed’s usability and longevity․
Troubleshooting Common Assembly Issues

Encountering difficulties during assembly is common․ Misaligned components often occur; loosen nearby bolts, gently adjust alignment, and retighten․ Difficulty installing gas lift struts usually stems from incorrect orientation – ensure the arrow points towards the lifting end․ Double-check the attachment points and strut length․
If slats don’t fit snugly, verify the slat holders are correctly positioned and securely fastened․ Stripped screw holes can be addressed with wood glue and toothpicks, allowing for re-screwing․ Missing parts? Consult your retailer or manufacturer; referencing your model number speeds up the process․
Remember to avoid over-tightening screws, which can damage the frame․ Carefully review the instructions and diagrams for clarification before forcing any connections․

Misaligned Components
Dealing with misaligned components is a frequent challenge during ottoman bed assembly․ Initially, don’t force connections; this can cause damage․ Instead, carefully loosen the bolts or screws on adjacent parts․ This creates play, allowing for easier adjustment․ Gently try to align the pieces, applying even pressure․
Inspect the connecting holes for obstructions or debris․ Ensure you’re using the correct hardware for each connection point, as incorrect screws can prevent proper alignment․ If misalignment persists, double-check the orientation of the components against the assembly diagrams․
Sometimes, a slight adjustment to the frame’s overall squareness can resolve the issue․ Retighten all fasteners once alignment is achieved, but avoid over-tightening․
Difficulty with Gas Lift Strut Installation
Installing gas lift struts can be tricky, often requiring significant force․ Ensure the correct strut orientation is followed – typically indicated by markings or diagrams․ If the strut resists compression, double-check that the mounting points are correctly aligned and securely fastened․
Utilize a lever, like a sturdy screwdriver or piece of wood, to gently assist in compressing the strut into position․ Be extremely cautious during this process, as sudden release can cause injury․ Work with a partner for added safety and leverage․
Confirm the strut clicks or locks firmly into place at both ends․ Inspect for any damage to the strut or mounting brackets․ If issues persist, revisit the instructions and verify all preceding steps were completed correctly․
Safety Precautions During Assembly
Prioritize safety throughout the ottoman bed assembly process․ Always wear appropriate safety glasses to protect your eyes from flying debris, especially when using power tools․ Gloves are recommended to prevent splinters and hand injuries․
Ensure a well-lit and spacious workspace, free from obstructions․ Lift heavy components with a partner to avoid strain or injury․ Be mindful of pinch points, particularly when assembling the ottoman mechanism and attaching the gas lift struts․
Never force components together; if resistance is met, re-examine the instructions․ Keep small parts and packaging away from children․ Disconnect power tools when not in use and follow manufacturer’s safety guidelines․ Regularly check for loose screws or bolts during and after assembly․
Maintaining Your Ottoman Bed
Regular maintenance ensures the longevity and smooth operation of your ottoman bed․ Periodically check all screws and bolts, tightening them as needed to prevent wobbling or instability․ Inspect the lifting mechanism, specifically the gas lift struts, for any signs of damage or wear․

Clean the fabric base regularly with a vacuum cleaner or damp cloth, avoiding harsh chemicals․ Avoid placing excessive weight on the ottoman platform, as this can strain the mechanism․ Lubricate moving parts, such as hinges, with a silicone-based lubricant to ensure smooth operation․
Inspect the slats for any cracks or damage, replacing them if necessary․ Protect the bed from direct sunlight and moisture to prevent fading and warping․ Follow these simple steps to keep your ottoman bed in optimal condition for years to come․
Identifying Specific Model Variations (Birlea as an Example)
Ottoman bed designs vary significantly between manufacturers and even within a single brand’s product line․ Birlea, a popular brand, often features unique assembly nuances compared to generic instructions․ Always prioritize the specific manual included with your bed model․
Birlea beds may utilize different hardware, slat systems, or ottoman mechanism configurations․ Pay close attention to component labeling and diagrams in the Birlea manual․ Variations can exist in headboard attachment methods or the sequence for installing the lifting mechanism․
Online resources, including Birlea’s website and customer forums, can provide model-specific guidance․ If encountering difficulties, search for instructions tailored to your exact Birlea model number․ Ignoring these distinctions can lead to incorrect assembly and potential damage․
Using the Google Maps App for Parts Location (If Needed)
Should you discover a missing component during assembly, locating a replacement store quickly becomes crucial․ Google Maps is an invaluable tool for identifying nearby furniture retailers or hardware stores carrying ottoman bed parts․ Simply open the app and search for “furniture stores” or “hardware stores․”
Utilize the filter options to refine your search, specifying stores with online inventories or those known to stock bed components․ Google Maps displays store locations, hours, contact information, and customer reviews․ Enable location services for accurate, real-time results․
The app’s navigation feature provides turn-by-turn directions, ensuring a swift journey to the store․ Before heading out, confirm part availability by calling ahead․ Google Maps can also help locate official Birlea retailers, if applicable, streamlining your search․
Offline Map Download for Instructions Access
To ensure uninterrupted access to assembly guidance, especially in areas with limited internet connectivity, downloading offline maps within Google Maps is highly recommended․ Open the Google Maps app on your Android or iOS device and search for the location where you’ll be assembling the bed․
Tap on the location name, then scroll down and select “Download offline map․” Adjust the area to be downloaded, ensuring it encompasses your assembly location․ Downloaded maps allow you to view the area and access saved locations even without an internet connection․
This is particularly useful if you’re referencing online instructions or videos alongside the physical guide․ Remember to periodically update your offline maps to reflect any changes in the area․ Having offline access provides peace of mind and prevents frustrating interruptions during the assembly process․
Final Inspection and Usage Tips
Before fully utilizing your newly assembled ottoman bed, conduct a thorough final inspection․ Carefully check all screws, bolts, and connections to ensure they are securely tightened․ Test the ottoman lifting mechanism multiple times, verifying smooth and effortless operation without any obstructions or unusual noises․
Inspect the fabric base for any tears or damage incurred during assembly․ Avoid exceeding the bed’s weight capacity, as this could compromise the structural integrity and the ottoman mechanism․ Regularly vacuum or dust the bed frame and fabric to maintain cleanliness․
When lifting the ottoman, ensure the area beneath is clear of any objects․ Distribute weight evenly on the platform when storing items․ Enjoy the convenience and space-saving benefits of your ottoman bed!